Creating a Merchant ID Apple Pay in the Merchant Back Office
- Sign in to your Merchant Back Office:
- Go to Settings > Company > Merchant IDs.
- Click Create a Merchant ID (MID). The Selection of Merchant ID type dialog box appears. Merchant ID types are displayed as icons.
- Select Apple Pay.
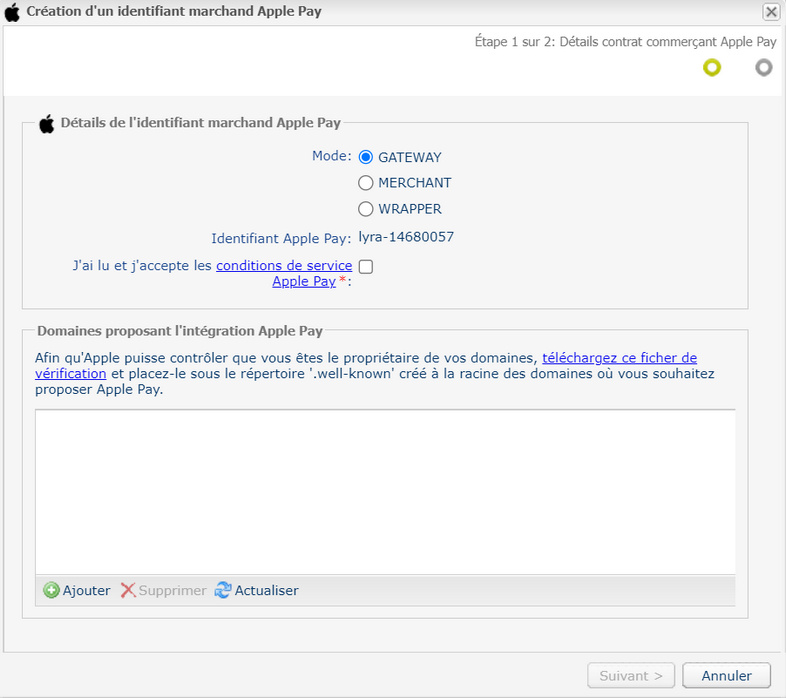
- Select the GATEWAY mode.
- Read and accept the Apple Pay terms of service by checking the box provided for that purpose.
This action is required for finalizing the creation of a Merchant ID.
- Apple Apple provides a file to verify the owner of your domain. We recommend that you complete this step after creating your contract by following the Declaring your domain name with Apple procedure.
This step is mandatory only if you are performing integration in embedded mode.
In redirection mode, this step remains optional, as the domain of the payment gateway (secure.gateway.monetico-retail.com) is already recognized by Apple.
If you plan to offer Apple Pay via other integration modes (embedded mode, mobile SDK, etc.), you must declare your domain for verification with Apple.
- Click Next.
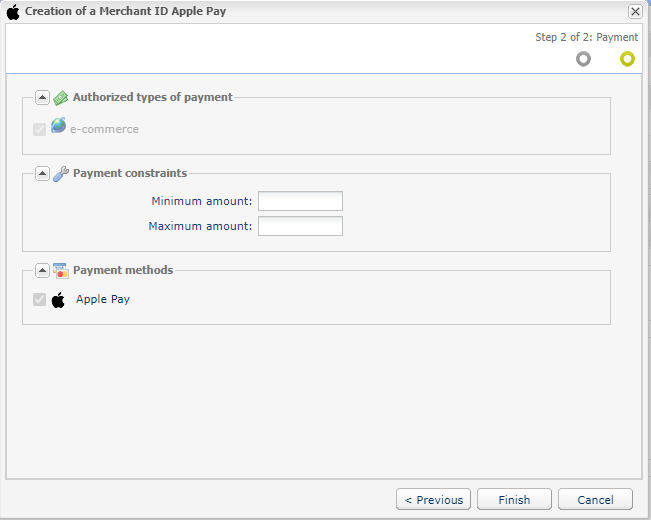
- If you want to set thresholds for when Apple Pay will be offered to the buyer, enter the Minimum amount and Maximum amount.
- The Apple Pay payment method is selected by default.
- Click Finish.
When the Association of the Merchant ID (MID) window appears, check the shop(s) to associate with this contract.
If you are unable to associate the contract with your shop, contact the Monetico Retail Support for checking your offer.