• France
status page
demonstrations
assistance
FAQContact support
Search
Categories
Tags
English
French
English
Homepage
Use cases
Create a payment
Create an installment payment
Create a multi-card (split) payment
Create a payment by Alias (Token)
Create a payment link
Create a recurring payment
Manage subscriptions
Manage your transactions (refund, cancel...)
Analyze your reports
API docs
Embedded Form
REST API
Hosted payment
Mobile payment
File exchange
Snippets
Payment methods
Plugins
Guides
Merchant Back Office
Functional guides

Declaring a Merchant ID Apple Pay in Merchant Back Office

  1. Sign in to your Merchant Back Office:

  2. Go to Settings > Company > Merchant IDs.

  3. Click Create a Merchant ID (MID).

    Merchant ID types are displayed as icons.

  4. Select Apple Pay.

  5. Select the MERCHANT mode.

  6. Enter your Merchant ID Apple Pay obtained upon signing up for Apple Developer.

  7. Click Next.

  8. If you want to set thresholds for when Apple Pay will be offered to the buyer, enter the Minimum amount and Maximum amount.

  9. The Apple Pay payment method is selected by default.

  10. Click Finish.

    When the Association of the Merchant ID (MID) window appears, check the shop(s) for which you would like to offer Apple Pay.

     If you are unable to associate the contract with your shop, contact the Monetico Retail Support for checking your offer.

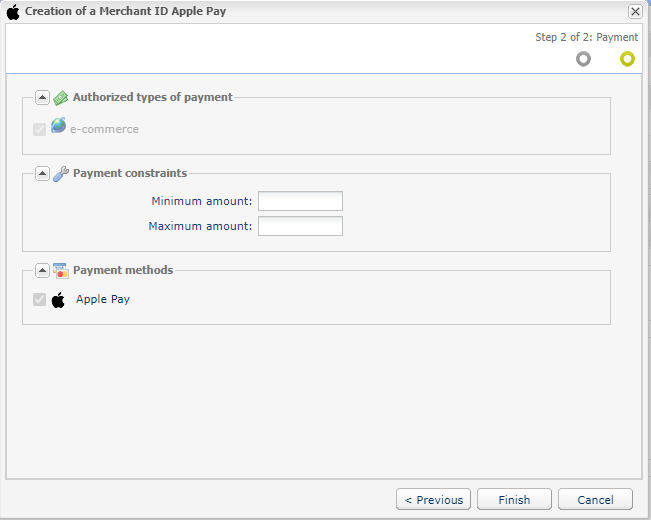
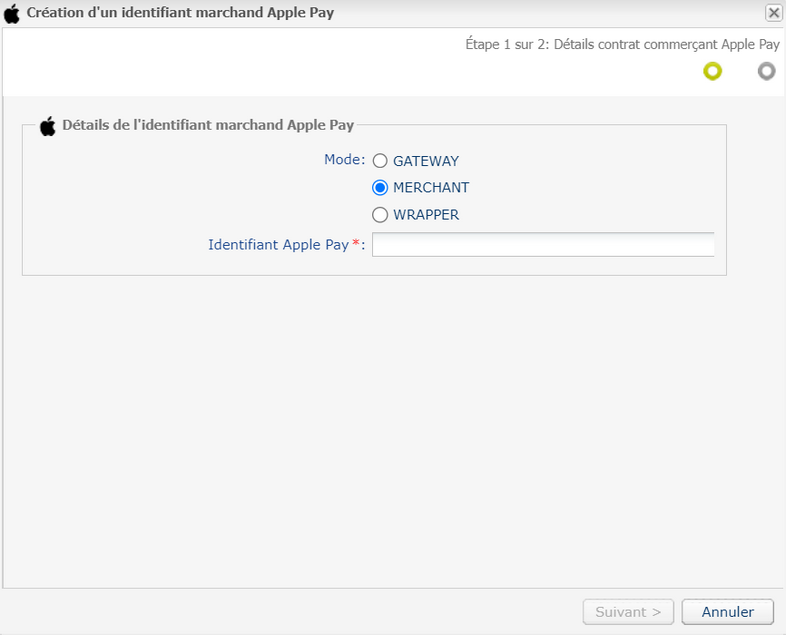
Follow the steps below to finalize the contract declaration.

© 2025 {'|'} All rights reserved to Monetico Retail
25.22-1.11